What is a Fetch shipping address?
You can think of your Fetch shipping address as a P.O. box that delivers directly to you! Your Fetch shipping address is our facility address that includes your apartment’s unique Fetch code identifier. You will use your Fetch shipping address for standard packages, boxed and wrapped furniture, and subscription food boxes. Simply update your shipping address online to get started.
Steps for changing your Shipping address
1) Locate your fetch address either on the Fetch app or account settings online.
2) Visit sites that you frequently order from and log in to your account (if you have one)
- Navigate to the shipping address section
- Place the Fetch facility address on the first line
- Your Fetch code will go on the Apartment/Suite number line. Note: If you are having trouble placing your Fetch code on the second line, simply place the code on the first line with the facility address.
- Add the City, State & Zip that matches the Fetch facility address
3) Notify your friends and family of your new shipping address
4) Check on your packages that are in-transit to your apartment address. Contact the carrier to update your shipping address and have it routed to our facility.
Updating your shipping address through various vendors and carriers can seem overwhelming, but Fetch is here to help. If you need any support on using the Fetch address, read our FAQs or reach out to our wonderful customer experience team!

How to change your shipping address on popular sites
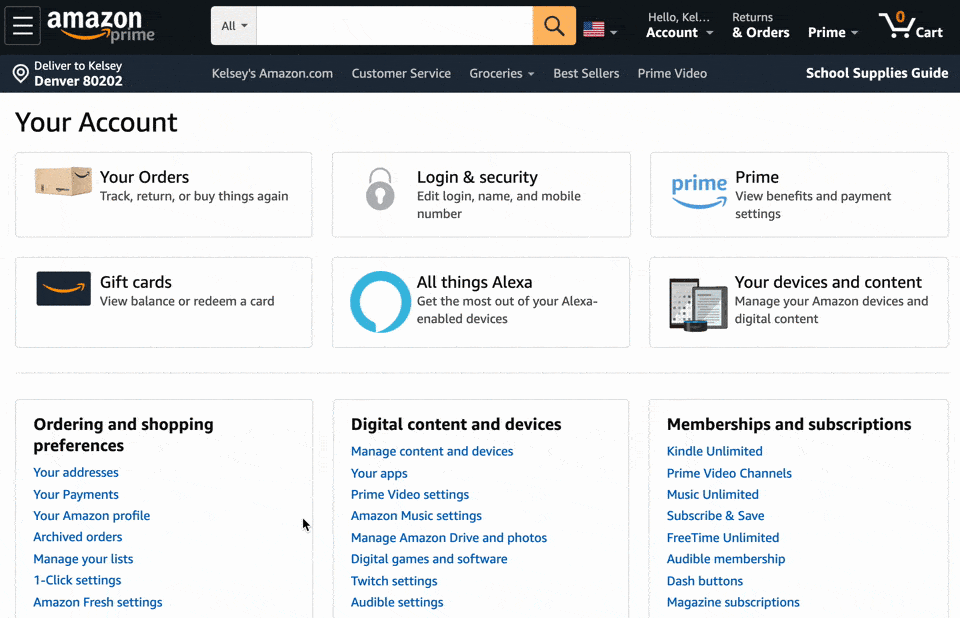
- Sign in to your Amazon account
- Go to the upper right corner under “accounts and lists” *(in the application, it would be on the left side if you click on the three lines)
- Click “Your Account”
- In the left-hand box, click “Your Addresses” *(In the application, it is in the second box under “Account Settings)
- Add your Fetch address
- Set as default using the “Set as Default” button so that you don’t have to worry about choosing the address every time you check out!
- Sign in to your Target account
- Click on your name in the upper right-hand corner of the site
- Click “Account”
- On the left-hand side, click “Addresses”
- Add your Fetch address
- Click the “Default Address” button at the bottom of the page before saving so that you don’t have to worry about choosing the address every time you check out!
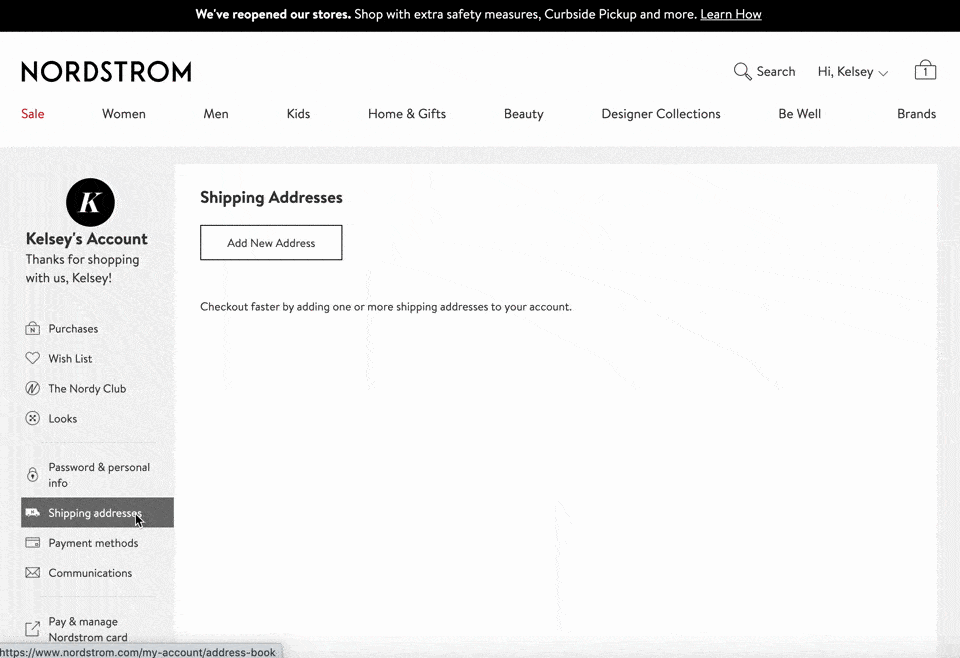
- Sign in to your Nordstrom account in the upper right-hand corner of the screen
- Hover over your name on the upper right corner, and choose “Your Account”
- Scroll down on the left-hand side and choose “Shipping Addresses”
- Click “Add New Address” and input your Fetch shipping address
- Click “Make This My Primary Shipping Address” before saving so that you don’t have to worry about choosing the address every time you check out!
- Sign in to your Walmart account by clicking “account” and “sign in” in the top right-hand corner of the screen
- Click on your “account” again
- Scroll down and click “account” from the pop-up
- On the left-hand side, choose “Delivery Addresses”
- Add your Fetch address with the “add new delivery address” box
- Check the box “Save as Preferred Address” so that you don’t have to worry about choosing the address every time you check out!
Accidentally use your apartment address and not your fetch address? No need to fret!
You should always be able to update your shipping address with the carrier. Some carriers will hold the package for pick-up if it is intercepted, while some will reroute the package to Fetch depending on their procedures. Here is how to update a shipping address if a package is in-transit with the carrier:
- Register/Sign-In at the top right-hand corner
- Click “intercept a package”
- Enter your tracking number on the left-hand side of the screen
- Follow USPS instructions on how to intercept the package
- Log in to My UPS.
- Select the Shipping tab at the top of the page.
- Select Create a Shipment in the area at the left of the page, then select View History or Void Shipment.
- In the Previous Shipments section, you will see a summary of your recent shipments.
- On the Packages Eligible for Intercept page, select the radio button next to the type of intercept you want to request for your package(s).
- Review or modify your package selection.
- When satisfied, select Next.
- Regardless of your intercept type selection, UPS requires additional information to complete the request. Complete the required fields, indicated with a Required symbol.
- Select Submit. A confirmation page is displayed.
- On the Confirmation page, select the Request Intercept for Remaining Packages link if you want to request a different intercept type for the remaining packages in your shipment.
For FedEx rerouting, you can call their customer service line at 1.800.463.3339